How to Configure Azure MFA with Exchange Server 2013 and ADFS 2012 R2

How to Configure Azure MFA with Exchange Server 2013 and ADFS 2012 R2
How to Configure Azure MFA with Exchange Server
Introduction :
I was struggling to configure Azure MFA and Exchange without to use ADFS due to Exchange doesn't have Page to type text, the only phone call will work, eventually I decided to use ADFS due to this is only the way to have MFA (OTP) with Exchange. This is a quick guide to configure Azure MFA with Exchange & ADFS
In this article I will demonstrate how you will apply MFA with Exchange server which has configured to use ADFS authentication, nowadays security of any organization is mandatory especially if they have applications have published externally. MFA comes to add the additional layer of security for these applications and will make organization a tad bit secure than the traditional static password. I believe Azure MFA has most of the capabilities of MFA that any organization might be looking for. If we will talk about MFA integration/compatibility with 3rd party application, then we can say integration MFA with ADFS made any kind of integration/compatibility between MFA and 3rd party application is doable.
Prerequisite :
- Exchange server 2013
- ADFS server 2012 R2
- AD server
In this article I will divide the configuration in two part as follows:
- Configure ADFS with Exchange server.
- Install MFA server and Configure MFA with ADFS server.
Part 1 : Configure ADFS with Exchange server :
- Create Relay Party for (OWA and ECP).
- Adding Claim Rules (Active Directory user SID and Active Directory UPN).
- Import/Export token Sign certificate of ADFS.
- Configure Exchange Authentication.
Part 2 : Install MFA server and Configure MFA with ADFS server :
- Download MFA server.
- Install full MFA server on ADFS server.
- Install ADFS adapter only on ADFS server
- Configure MFA option in ADFS Server (Global and Relay Party).
Part 1 : Configure ADFS with Exchange server :
ADFS comes to replaces the normal authentication methods that are available for OWA and the ECP in Exchange server. For example:
- AD client certificate authentication
- Basic authentication
- Forms authentication
- Windows authentication
In ADFS server you must add service need to be configured/federated with, here we are going to add Exchange server in “Relay Party Trust” to allow exchange server used ADFS authentication, this is the first step needs to be done prior to change authentication in Exchange server itself.
ADFS can be configured with below services in Exchange server :
- OWA (Can be configured with ADSF)
- ECP (Can be configured with ADSF)
- EWS (Can be configured with ADSF but I’m not sure about the impact if Authentication changed to ADFS)
- Microsoft-Server-ActiveSync (Not-Applicable)
In this article, we will configure only OWA and ECP.
1.1. Create a relying party trust and custom claim rules in AD FS for OWA and ECP :
- Open ADFS Server.
- Open ADFS management.
- Expand “Trust Relationship”
- Right, Click “Relaying Party Trust” > Click Add Relating part Trust.
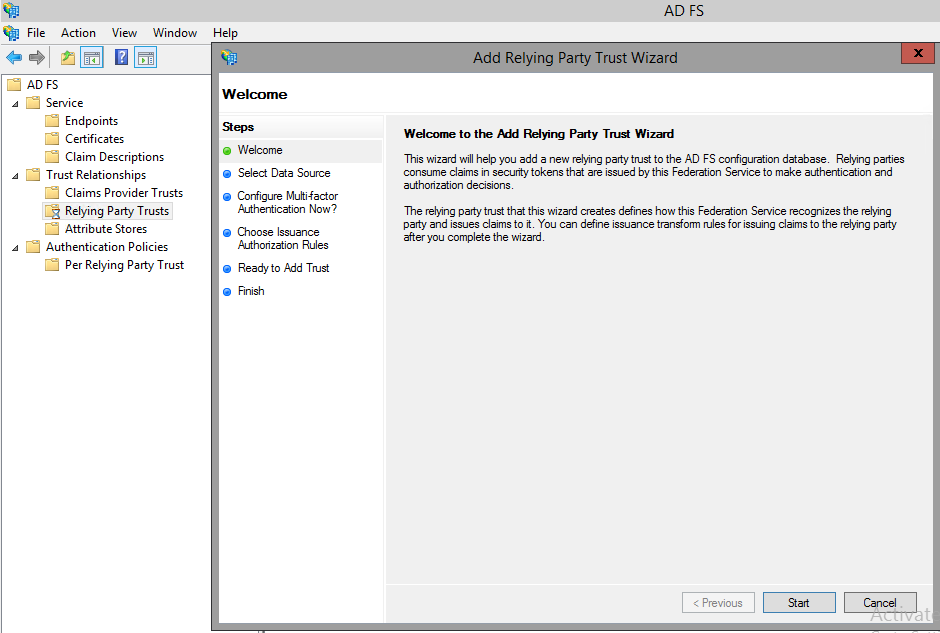
- Click Start.
- Select Enter data about the relying party manually
- Display name type : OWA > Click Next
- Select ADFS Profile > Click Next
- On “Configure Certificate”, Click Next (Don’t change anything)
- On “Configure URL”, select “Enable support for the WS-Federation Passive protocol”, and in “Relying party WS-Federation Passive protocol URL”, type https://mail.ABC.com/owa/
- On “Configure Identifier”, Click Next
- On “Configure Multi-factor Authentication Now?” Select “I don’t want to configure” > Click next
- On “Choose Issuance Authorization Rules”, select “Permit all users to access this relying party”, Click Next.
- On “Ready to Add Trust”, review the settings then click Next to save relying party trust information.
You have to do the same for ECP, create another relying party trust, repeat these steps again, but instead of putting in OWA for the display name, enter ECP. and the Relying party WS-Federation Passive protocol URL type ECP URL : https://mail.ABC.com/ecp.
1.2. Create Custom claim rules in AD FS for OWA and the ECP .
We need to add two claim rules for each relay party (OWA and ECP) as following :
- Active Directory user SID
- Active Directory UPN
- Open AD FS Management,
- Expand Trust Relationships select Relying Party Trusts, and then select OWA or ECP relying party trust.
- Right click on OWA or ECP then select Edit Claim Rules.
- In the Edit Claim Rules, verify that the Issuance Transform Rules tab is selected, then click Add Rule.
- The Add Transform Claim Rule Wizard opens. On the Select Rule Template page, click the Claim rule template drop down, and then select Send Claims Using a Custom Rule. click Next.
- On the Configure Rule, enter the following information:
- Claim rule name: Enter description name for the claim rule.
- Custom rule: Copy and paste the following text :
c:[Type == "http://schemas.microsoft.com/ws/2008/06/identity/claims/windowsaccountname", Issuer == "AD AUTHORITY"] => issue(store = "Active Directory", types = ("http://schemas.microsoft.com/ws/2008/06/identity/claims/primarysid"), query = ";objectSID;{0}", param = c.Value);
"Costume rule from Microsoft Technet"
Add Another Claim Rule for Active Directory UPN :
- Open AD FS Management,
- Expand Trust Relationships select Relying Party Trusts, and then select OWA or ECP relying party trust.
- Right click on OWA or ECP then select Edit Claim Rules.
- In the Edit Claim Rules, verify that the Issuance Transform Rules tab is selected, then click Add Rule.
- The Add Transform Claim Rule Wizard opens. On the Select Rule Template page, click the Claim rule template drop down, and then select Send Claims Using a Custom Rule. click Next.
- On the Configure Rule, enter the following information:
- Claim rule name: Type description name for the claim rule.
- Custom rule: Copy and paste the following text :
c:[Type == "http://schemas.microsoft.com/ws/2008/06/identity/claims/windowsaccountname", Issuer == "AD AUTHORITY"] => issue(store = "Active Directory", types = ("http://schemas.xmlsoap.org/ws/2005/05/identity/claims/upn"), query = ";userPrincipalName;{0}", param = c.Value);
"Costume rule from Microsoft Technet"
1.3. Import/Export token Sign certificate of ADFS.
In ADFS server there are two important certificates need to be considered as follows:
- A service communication Secure Sockets Layer (SSL) certificate for encrypted web services traffic between the AD FS server.
- A token-signing certificate for encrypted communication and authentication between the ADFS server, Active Directory domain controllers, and Exchange servers.
You have to import token-signing certificate from ADFS server and install it on All Exchange servers (Mailbox and CAS servers) :
- Go to ADFS server
- Open MMC > Certificate > Intermediate Certificate
- You will find “ADFS signing Certificate” right click on this certificate and export it.
- Import Certificate on all Exchange servers under “trusted root Certificate”
After importing certificate, Go to ADFS server and type below command :
Open Power shell :
- Import-Module ADFS
- Get-AdfsCertificate -CertificateType Token-Signing
“Copy Thumbprint from the previous command then apply below command”'
Set-OrganizationConfig -AdfsIssuer https://ADFS.ABC.com/adfs/ls/ -AdfsAudienceUris "https://mail.ABC.com/OWA"," https://mail.ABC.com/ecp" -AdfsSignCertificateThumbprint "<Thumbprint>"
"Costume rule from Microsoft Technet"
1.4. Configure Exchange Authentication.
In this part, we need to change the type of Exchange Authentication to ADFS as we have explained previously Exchange has 5 traditional Authentication but if we need Exchange to used ADFS Authentication need to enable
-AdfsAuthentication”
Configure ECP Virtual directory :
- Open Exchange Server
- Open Power Shell
- Type below command:
Get-EcpVirtualDirectory | Set-EcpVirtualDirectory -AdfsAuthentication $true -DigestAuthentication $false -BasicAuthentication $false -FormsAuthentication $false -OAuthAuthentication $false -WindowsAuthentication $false
Configure OWA Virtual directory :
- Open Exchange Server
- Open Power Shell
- Type below command:
Get-OwaVirtualDirectory | Set-OwaVirtualDirectory -AdfsAuthentication $true -DigestAuthentication $false -FormsAuthentication $false -BasicAuthentication $false -OAuthAuthentication $false -WindowsAuthentication $false
Part 2 : Install MFA server and Install MFA server and Configure MFA with ADFS server
2.1. Download MFA server.
Azure MFA is a feature of Azure Active Directory Premium and can be deployed either in the cloud or on-prem. Before 1 of Sep 2018 customer can purchase MFA standalone without Azure AD premium but after 1 of Sep 2018 this offer no longer to purchase it, you can just to have MFA with Azure AD premium.
You can install full MFA server on ADFS server or you can install only ADFS Adapter and keep MFA server separately in the standalone server.
To download MFA :
- Go to Office 365 login page / Azure portal.
- Login by Admin Account
- Go to Azure Active Directory
- MFA Server
- Server Setting: Download MFA server and generate Key password
Install MFA server on ADFS server (Straight Forward installation – Recommended to install MFA by admin account to avoid any interruption installation).
After installation, Open MFA server > go to ADFS option > Select any additional options you'd like to specify for your organization then click on Install AD FS Adapter.
When the adapter has been installed, you must register it with AD FS.
Open Windows Power Shell:
C:\Program Files\Multi-Factor Authentication Server>\Register-MultiFactorAuthenticationAdfsAdapter.ps
2.3 Install ADFS adapter only in ADFS server :
1- Make sure you have standalone MFA server installed and function properly.
2- Configure SDK web-service in MFA server:
- If you didn't configure MFA portal, you have to Install IIS role in MFA server before to install web service SDK.
- Open MFA management
- Go to web service SDK.
- Click on Install web-service SDK.
- Edit config file in fallowing path : "C:\Program Files\Multi-Factor Authentication Server\MultiFactorAuthenticationAdfsAdapter"
Update below information in config file:
<UseWebServiceSdk>true</UseWebServiceSdk>
Change false from false to true
<WebServiceSdkUrl>https://MFAServerNAme.ABC.com/MultiFactorAuthWebServiceSdk/PfWsSdk.asmx</WebServiceSdkUrl>
Just Update server name in URL and keep URL as is
<WebServiceSdkUsername>ABC.com\serviceaccountname</WebServiceSdkUsername>
<WebServiceSdkPassword>Password</WebServiceSdkPassword>
Type username and password of MFA service account.
<WebServiceSdkCertificateThumbprint>0116F022BBBDDD7373F78245D4340</WebServiceSdkCertificateThumbprint>Copy Certificate Thumbprint of MFA server whether self-signed certificate, Private certificate or public certificate.
Use below command to list all certificate you have it in MFA server
Get-ChildItem -path cert:\LocalMachine\My
Now you need to copy MFA files from MFA server to ADFS server :
1. Copy the following files from the \Program Files\Multi-Factor Authentication Server directory
- MultiFactorAuthenticationAdfsAdapterSetup64.msi
- Register-MultiFactorAuthenticationAdfsAdapter.ps1
- Unregister-MultiFactorAuthenticationAdfsAdapter.ps1
- MultiFactorAuthenticationAdfsAdapter.config
2. Past files in ADFS server.
3. Install MultiFactorAuthenticationAdfsAdapterSetup64.msi
4. Then Edit file "Register-MultiFactorAuthenticationAdfsAdapter.ps1" and add this command
-ConfigurationFilePath "C:\Program Files\Multi-Factor Authentication Server\MultiFactorAuthenticationAdfsAdapter"
to the end of the Register-AdfsAuthenticationProvider command.
5. Save file.
6. Note: You can change path file of -ConfigurationFilePath to location where you have copied.
7. Run script "Register-MultiFactorAuthenticationAdfsAdapter.ps1"
8. After run script successfully, Reset ADFS service in ADFS server.
Now ADFS server is ready with MFA.
3.4. Configure MFA option in ADFS Server (Global and Relay Party).
To use newly registered adapter, edit the global authentication policy in AD FS :
- Open ADFS Server > Open ADFS console
- In the AD FS management console, go to the Authentication Policies node.
- In the Multi-factor Authentication section,
- Click the Edit link next to the Global Settings section.
- In the Edit Global Authentication Policy window, select Multi-Factor Authentication as an additional authentication method,
If you have other relay party has configured in ADFS server such (Office 365, Dynamic CRM, SaaS..etc) don't enable MFA on the global setting just enable it per relay party as following :
Activate MFA on ECP/OWA Relay party in ADFS :
- Open ADFS Server > Open ADFS console
- Authentication Policy > Per relaying party trust > double click on OWA/ECP
- Go to Multi-Factor > check External or Internal from location
Last step to Import AD users in MFA :
- Open MFA console > users > click on “Import from Active Directory”
- “You can import all users based on OU”
If user not added in MFA server will not be able to access OWA/ECP or even register his mobile, you have to add all required users in MFA.
Now you can test login to ECP or OWA if your mobile No. registered in MFA server will not ask you to register. Page of OWA and ECP will redirect automatically to ADFS login page.
Note : in Exchange server 2013 CU 17 and Exchange 2016 CU6 has the bug in MS Exchange OAuth after configuring ADFS. You need to recreate self-assign certificate for OAuth and install it in all Exchange server.
All the above steps have applied in my lab, and Exchange server has applied MFA (OTP) successfully.


Comments
Post a Comment